Have you recently downloaded my Lightroom Mobile presets? YAY!! Now it’s time to get them onto your phone so you can edit your photos with just one click. Read the tutorial below to get step-by-step instructions on how to get them on your phone, save them as Presets & organize them in folders to make the process as seamless as possible.
Step 1: Download the Presets!
Once you choose the Preset Pack that you want, simply download them to your computer. These presets come as a ZIP file that will have all of the presets you need! Unzip the files & get them ready to transfer over to your phone.
Step 2: Transfer the files onto your phone
There are so many ways you can get these files onto your phone. If you have a MacBook, access your iCloud files on your phone. If not, some apps you can use are Dropbox or Google Drive.
When on your computer, save the files to your preferred app & let them upload. Then go onto the corresponding app on your phone & download it directly onto your phone. When they are on your phone, they will be saved as images. If these images are blank, don’t be alarmed! This is exactly how they should look.
Step 3: Import the presets into Lightroom Mobile app
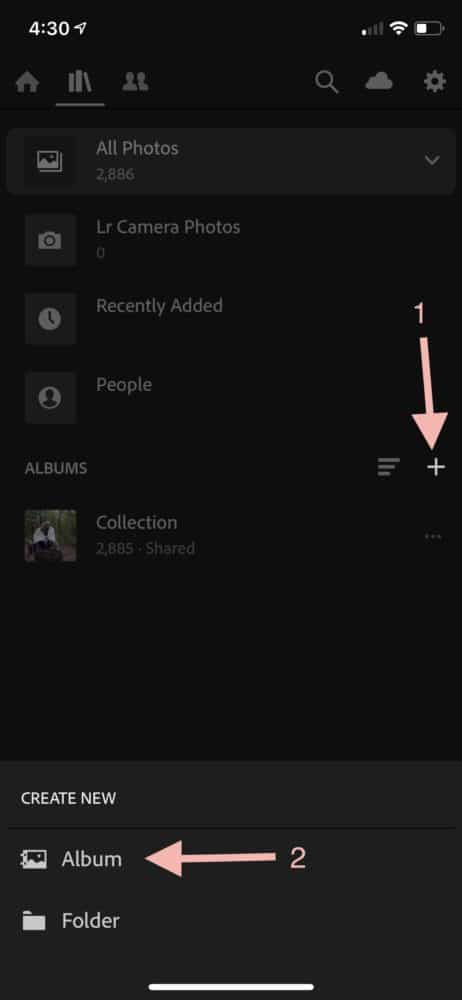
Open the Lightroom app & create a new album. I named mine “ML Presets”.
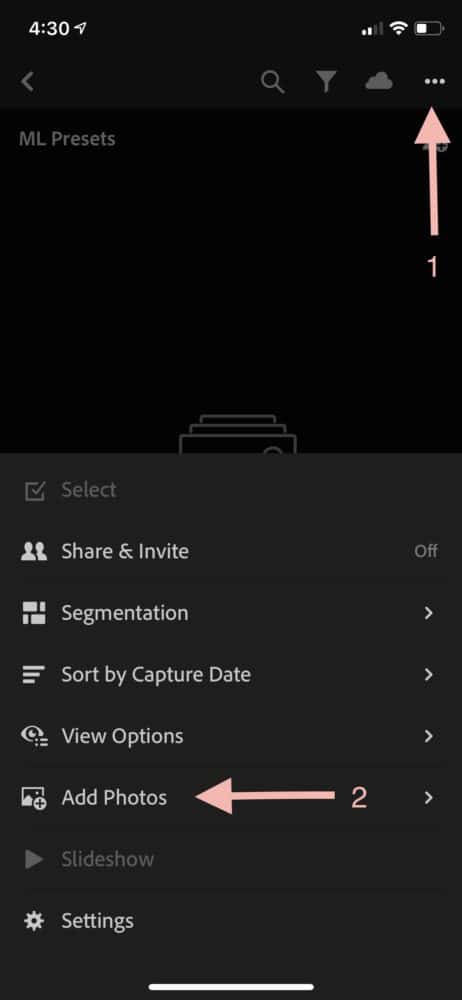
Open the new album you created, then click the three dots at the top right. Click on “Add Photos”.
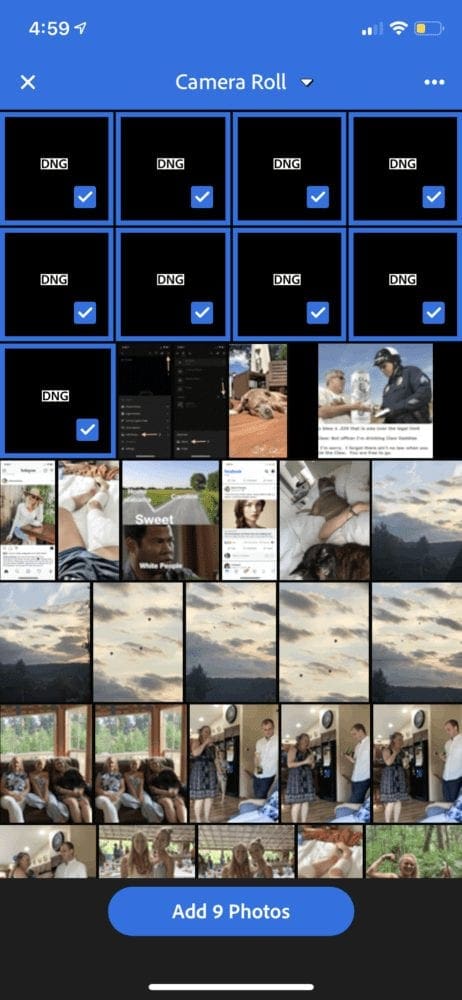
If getting the files from your iCloud through your MacBook, click on “From Files”. If you are using an app & you saved the photos from the app to your phone, click on “From Camera Roll”.
Step 4: Create & save your presets
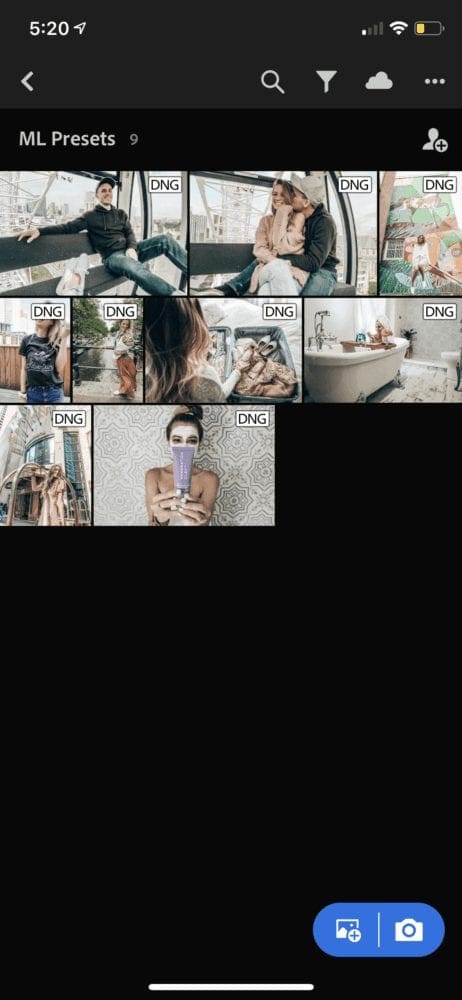
Open the new album you just made with all of the DNG files.
Open the first file & tap on the three dots in the top right corner. Then click on “Create Preset”.
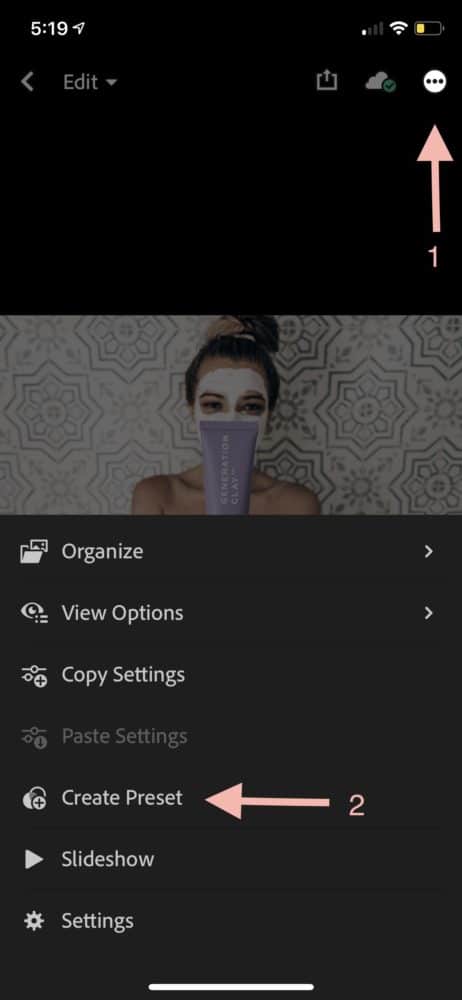
This will bring you to the “New Preset” screen where you can choose what options to save to customize your Preset. Give the Preset a name, then save it to a Preset Group. I recommend creating multiple Preset Groups based on the Preset Packs you purchase.
I recommend selecting the checkboxes below & leaving out Tools, Optics & Geometry.
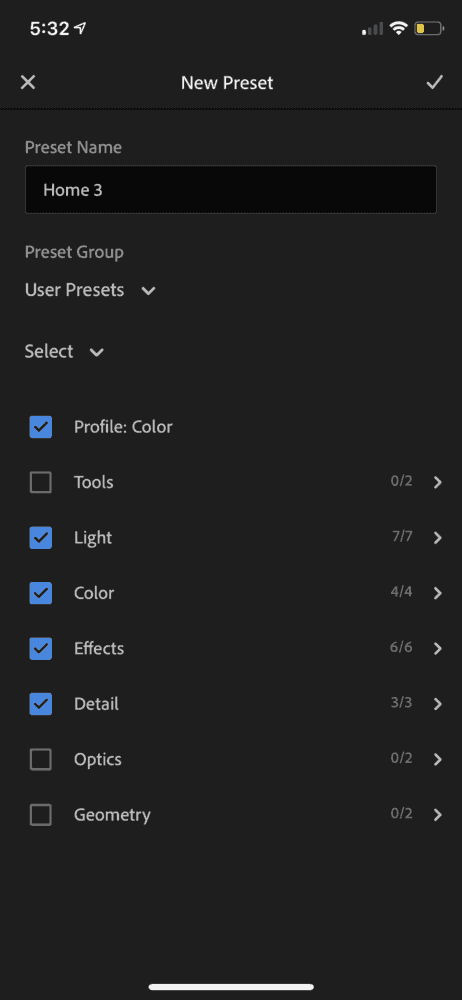
When you’re all done, click the checkmark in the top right corner. Repeat this step for each of the DNG files in your album. This only needs to be done once!!
Step 5: Use the presets!
Yay! Now it’s time for the fun part – using the presets! So open your library in Lightroom & add the photos you would like to edit. Once they are in your library, click on a photo to get started.
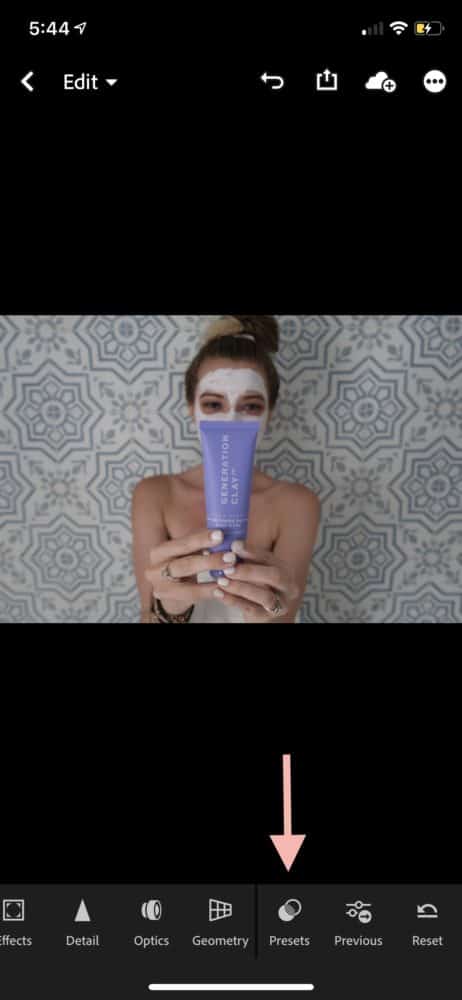
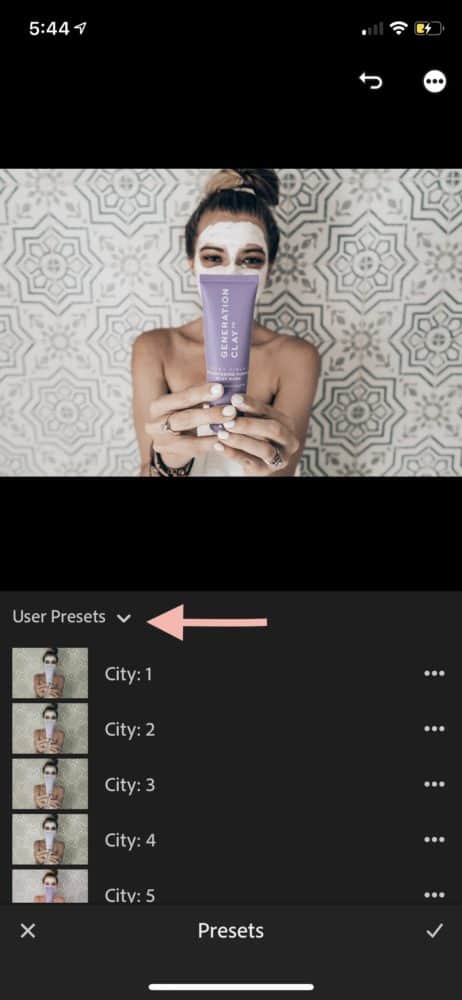
In the bottom menu bar, scroll over to the “Presets” button. Check to make sure the Preset Group selected is the one you saved the Presets to.
Edit your photo by selecting the Preset you would like to use on the photo. Try out a few & see which gives your photo the look you are going for! Once you find the one you like, hit the checkmark.
Make any additional adjustments you would like to make along the bottom menu & when you are done simply hit the download button on the top right & click “Save to Camera Roll”. And that’s it! You have officially edited your photo using your brand new presets!